This guide will go over the steps in setting up a simple SMTP Auth Server with TLS.
This is not a guide intended for a production environment but to learn how to set up a small SMTP server. A lot of work is required to maintain and manage your own SMTP server. I recommend using a commercial grade one if you are thinking setting one up for a small business.
With that said, I do think it is important to try and set one up for your own experience and I believe this approach could also come in handy when you need something simple for application testing or GoPhish campaigns.
Prerequisites
- A debian-based Linux VM has been created
sshis enabled with ansshkey pair- Firewall rules are open for inbound ports (recommend using
iptablesto restrict access to only your organization):- TCP 22
- TCP 80 (temporarily)
- Domain name
After setting up your VM and receiving a Public IP address, go to your Domain provider account, go to DNS and add two new DNS records:
| Name | Type | Data |
| A | <IP Address> | |
| @ | MX | mail.<domain>.com |
Installs
We will use Postfix as our mail server and sendmail to test sending mail from command line. Dovecot will be used for our SASL and Certbot to generate our TLS certificate files.
sudo apt -y update
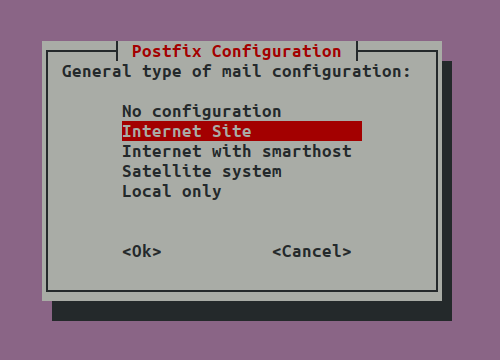
sudo apt -y install postfix certbot dovecot-coreWhen Postfix is installing it will prompt for an email type, select Internet Site.
Then enter your domain.
TLS Certificates
We can first open port 80 on our server and run certbot to generate a Let’s Encrypt certificate for our domain.
sudo certbot certonly --standalone
<enter email>
<enter mail.domain.com>
This will generate certificate and private key files at /etc/letsencrypt/live/mail.<domain>.com/ directory. We will use this when completing our setup for Postfix and Dovecot.
For more information about certbot visit here: https://certbot.eff.org/.
When finished, close off port 80.
Configure Postfix
Postfix is what we will be using as out SMTP server itself.
We can go over the options for Postfix:
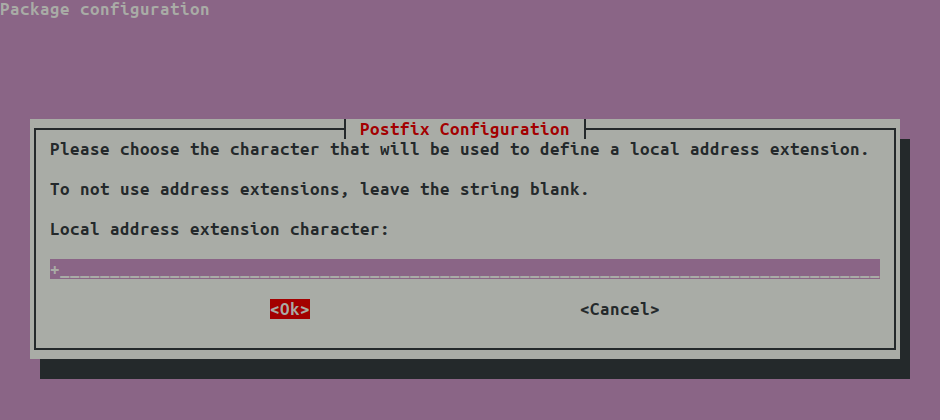
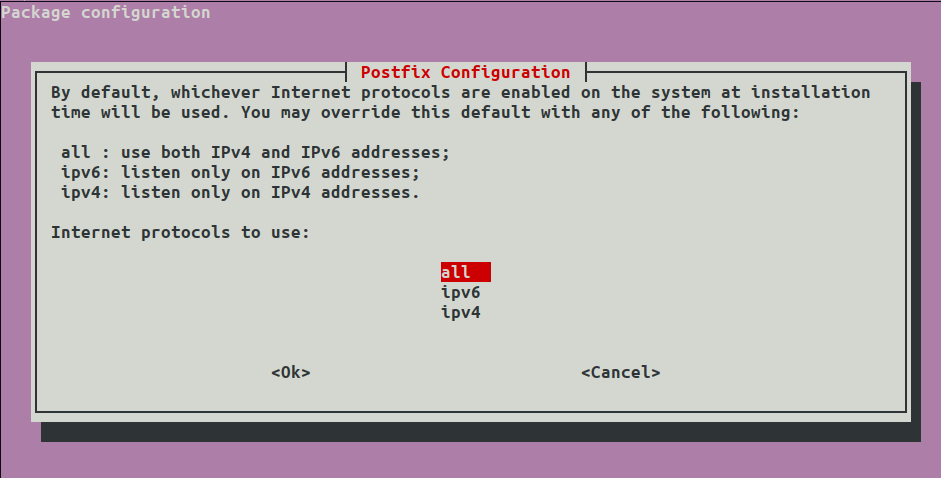
sudo dpkg-reconfigure postfixSelect OK:

Select Internet Site:
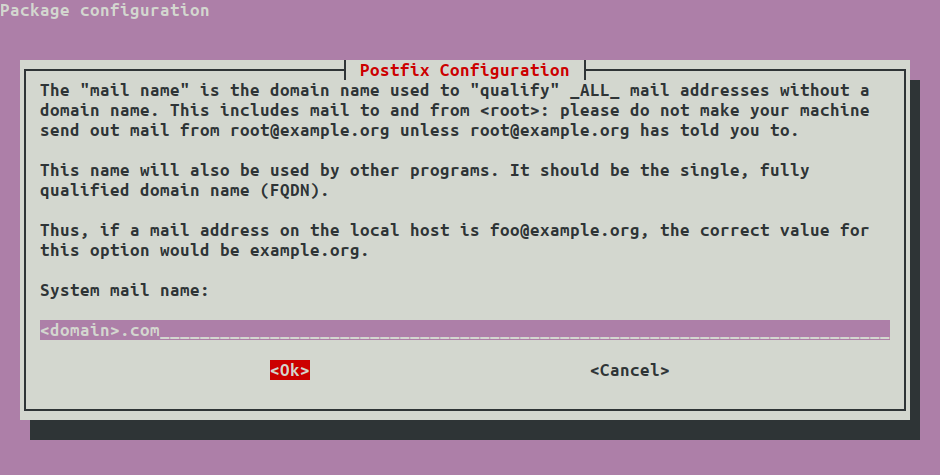
Then enter your domain name, tab to OK.
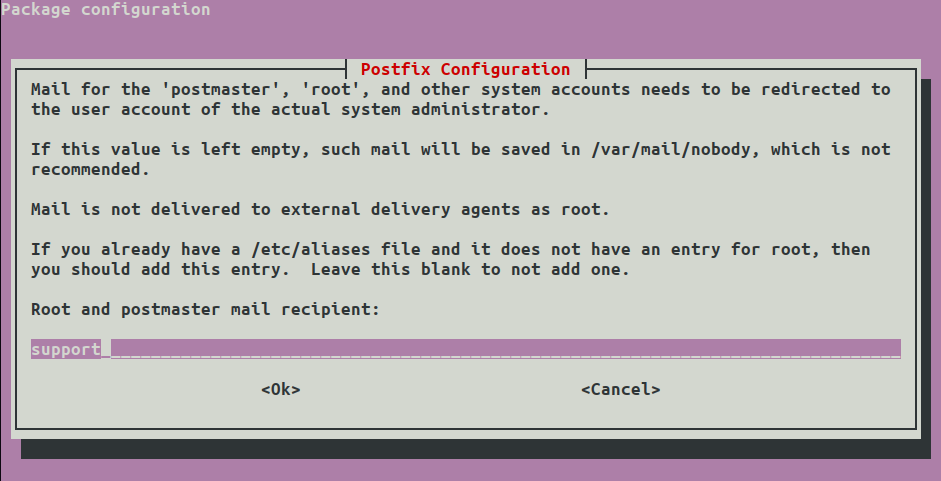
Enter a master user, in this case I used support but you could use root:
You can leave the defaults, tab to OK:
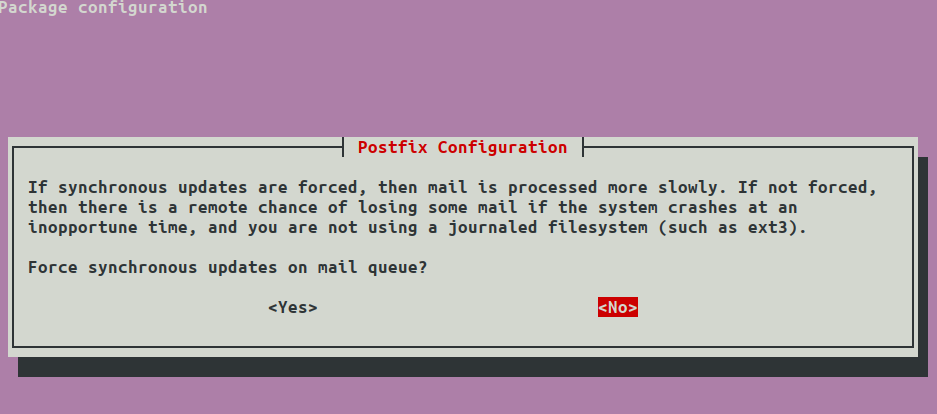
Select No:
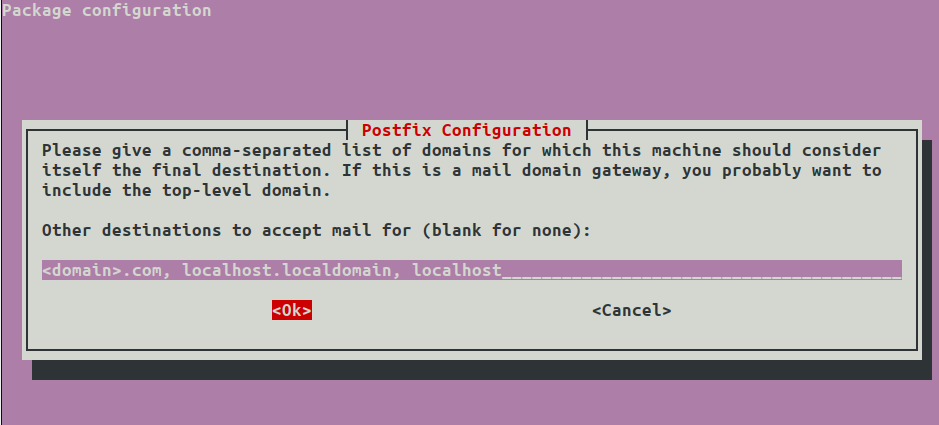
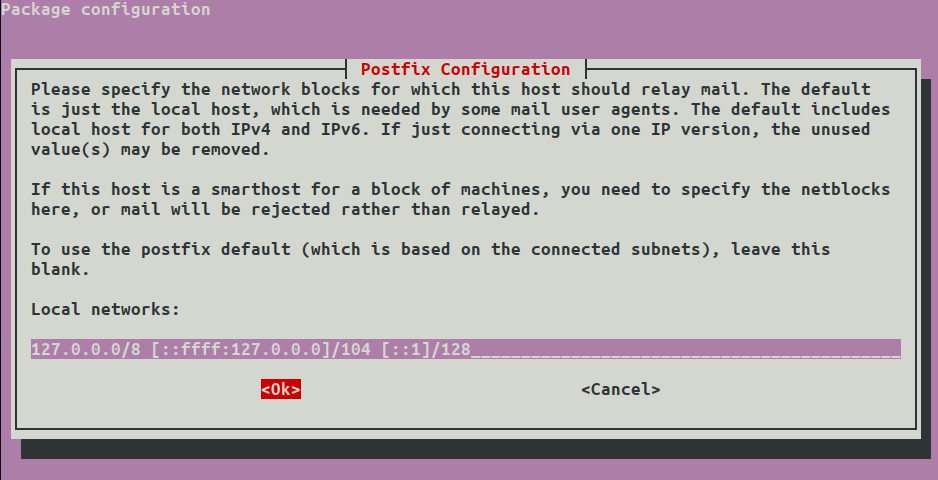
You can leave default networks, tab to OK:
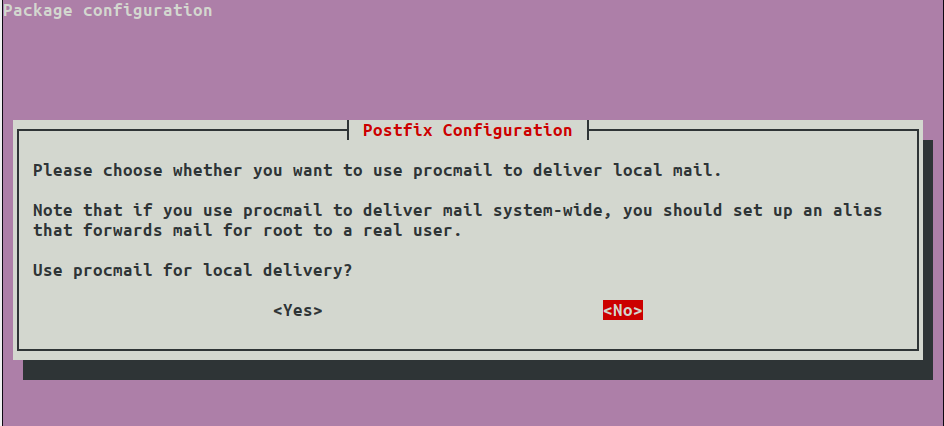
Select No:
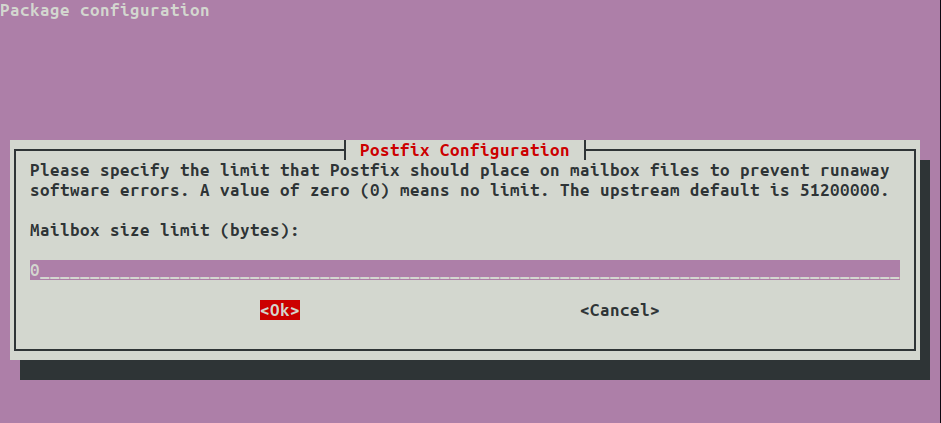
You can leave the defaults or choose a size limit, tab to OK:
You can leave defaults, tab to OK:
Leave the default to all, then tab to OK:
We could have essentially done this in the command line and going forward I just edit the main config file but this can be achieved using the intended way of sudo postconf -e '<parameter>'.
Let’s open the config file:
sudo vi /etc/postfix/main.cfMake sure our domain is set and setup a file path for our aliases (we will create the file next):
myhostname = mail.<domain>.com
virtual_alias_domains = $mydomain
virtual_alias_maps = hash:/etc/postfix/virtual
And add our SASL options:
smtpd_sasl_type = dovecot
smtpd_sasl_path = private/auth
smtpd_sasl_local_domain = <domain>.com
smtpd_sasl_security_options = noanonymous,noplaintext
smtpd_sasl_tls_security_options = noanonymous
broken_sasl_auth_clients = yes
smtpd_sasl_auth_enable = yes
And add our TLS options (changing the path for your TLS files):
smtp_tls_security_level = may
smtpd_tls_security_level = may
smtp_tls_note_starttls_offer = yes
smtpd_tls_key_file = /etc/letsencrypt/live/mail.<domain>.com/privkey.pem
smtpd_tls_cert_file = /etc/letsencrypt/live/mail.<domain>.com/cert.pem
smtpd_tls_loglevel = 1
smtpd_tls_received_header = yes
We can also add in basic security levels such as disabling VRFY command, forcing a HELO/EHLO command with the full qualified Domain name (FQDN), preventing open relays:
smtpd_helo_required = yes
smtpd_helo_restrictions = reject_non_fqdn_helo_hostname,reject_invalid_helo_hostname,reject_unknown_helo_hostname
disable_vrfy_command = yes
smtpd_delay_reject = yes
smtpd_recipient_restrictions = permit_sasl_authenticated,permit_mynetworks,reject_unauth_destination
If you are only using it to send outbound emails and not to receive them you can set the listener to just the loop back address:
inet_interfaces = loopback-onlySave and Exit with :wq.
We can create a virtual config to add aliases to user accounts:
sudo vi /etc/postfix/virtualAdd in aliases, you can use root for postmaster instead:
postmaster@<domain>.com support
support@<domain>.com support
Save and Exit with :wq.
We can configure Postfix to use the aliases:
sudo postmap /etc/postfix/virtualRestart the service:
sudo systemctl restart postfixConfirm the supported SASL contains Dovecot:
postconf -aConfirm the configuration:
postconf -nWe have now configured Postfix to use SASL but we haven’t actually set any up. We will next setup Dovecat.
Configure SASL
We will setup Simple Authentication and Security Layer (SASL) for our server. This is needed to send and receive data outside the SMTP server and vice versa. We can use Dovecot to authenticate towards the SMTP server and act as an inbetween for remote connections.
Edit the main config file:
sudo vi /etc/dovecot/conf.d/10-master.confAdd SMTP Auth for Postfix:
# Postfix smtp-auth
  unix_listener /var/spool/postfix/private/auth {
    mode = 0660
    user = postfix
    group = postfix
  }
Save and Exit with :wq.
Edit the authentication method:
sudo vi /etc/dovecot/conf.d/10-auth.confAppend login:
auth_mechanisms = plain loginSave and Exit with :wq.
Edit the ssl config:
sudo vi /etc/dovecot/conf.d/10-ssl.confAdd the new cert paths and make TLS required to connect. I also recommend using only TLSv1.2 connections:
# SSL/TLS support: yes, no, required. <doc/wiki/SSL.txt>
ssl = required

ssl_cert = /etc/letsencrypt/live/mail.<domain>.com/fullchain.pem
ssl_key = /etc/letsencrypt/live/mail.<domain>.com/privkey.pem

ssl_min_protocol = TLSv1.2
Save and Exit with :wq.
Restart the service:
sudo systemctl restart dovecotCreate User Account
I don’t like using root as the main account even if it is for testing. In this example we can setup an account called support, but you can skip if you want to use root.
adduser supportCreate a strong password and enter defaults.
Test
Test SMTP Authentication
telnet mail.<domain>.com 25
EHLO mail.<domain>.com
You should see a list of responses such as:
250-STARTTLS
250-AUTH PLAIN LOGIN
250-AUTH=PLAIN LOGIN
Test SASL Authentication
doveadm auth test <user>
Password: <enter password>
This should show that the authentication was successful:
passdb: support auth succeeded
extra fields:
  user=support
Test Mail
Test mail by sending from your domain to an external email:
sendmail -F "Support" -f support@<domain>.com -t <email>This will create a blank line after you enter the command. Here we can optionally add a Subject:
Subject: Test SubjectThen repeat for the body:
Test body.When you are finished use Ctrl+D to send.
Security
There are many security risks in running your own SMTP server. Any misconfiguration and you could leave your entire organization vulnerable. There are many things you will want to consider when setting up an email server.
Whichever route you take, always:
- use strong passwords
- use strong ciphers
- disable VRFY command
- require valid HELO or EHLO command
- restrict open relays
- setup DKIM
- setup SFP
You can read more about securing Postfix here: https://linux-audit.com/postfix-hardening-guide-for-security-and-privacy/.